UniFS™ as a Service
Azure Installation Guide
Follow this guide to provision the UaaS Resource Group into your Microsoft Azure account.
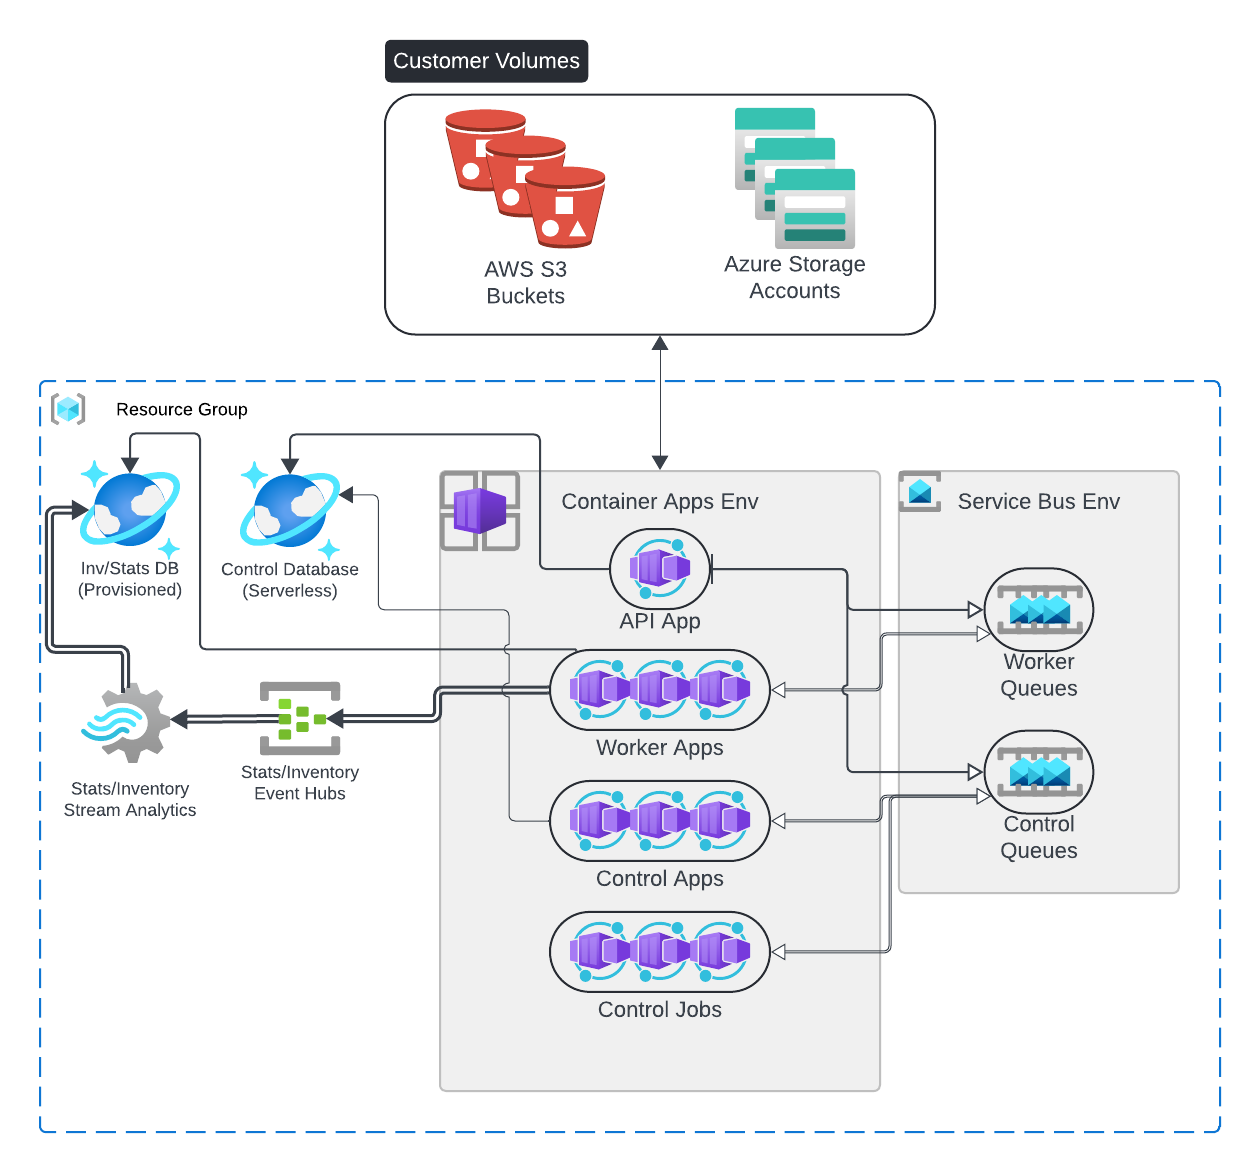
How UaaS on Azure works
A configured pool of Azure Container Apps is used to process several different ServiceBus queues that are separated by priority and size. The API layer is separated into its own container app in the same container environment. Volume metadata is inventoried and streamed into Cosmos DB using EventHub and Stream Analytics.
Prerequisites
As an Azure operator, you can either use the built-in Azure
Owner role at the Subscription level
or you can use our custom deployment role, which can be attached to a user or to an Enterprise Application Service Principal.
Creating Enterprise Application
If you would like to attach the role to a standard user or already have an enterprise application, you can skip this step.
Follow the instructions at https://learn.microsoft.com/en-us/entra/identity-platform/howto-create-service-principal-portal to create a Service Principal and create credentials. You will need to assign a user as the configuration manager of this Service Principal; however, you should not assign any roles beyond the defaults.
Deploying a UaaS Role
We provide an ARM template in order to deploy the role with the following options:
deployRoleName: The name of the role you are deployingassignPrincipalId: (Optional) Principal ID (object ID of your principal) to which we will attach the created roleassignPrincipalType: (Optional) The type of principal to which you are assigning. Defaults toServicePrincipal.- Allowed values are
Device,ForeignGroup,Group,ServicePrincipal, andUser
Deploying UaaS Resource Group (RG)
Click the following button to create a Resource Group in your Azure subscription that will be used for the UaaS Deployment.
Adding a Resource Group administrator
We do not supply a least-privileges role for the Resource Group. Instead, we recommend
using a built-in role at the ResourceGroup level and assigning it to your designated
Nasuni administrator.
More info about built-in Azure roles can be found here.
We recommend using the Contributor role to provide appropriate privileges for Resource Group management.
Deployment Options
- Subscription: Subscription where your Resource Group is to be deployed.
-
- Resource Group: Name of the Resource Group for UaaS deployment.
- Resource Details - Region: Region in which the Resource Group will be deployed.
Via Azure Command Line
The Resource Group can also be created with the CLI, using a command like:
az group create \
  --subscription <subscriptionGuid> \
  --location <location> \
  --name <uaasStackName>
where <location> is the location (region) of the deployment;
and <uaasStackName> is the name of the Resource Group for UaaS deployment.
Assigning Roles (Optional)
Note
This step is only required if you would like a user who does not have Subscription-level ownership permissions to manage and deploy your stack.
After you have created the Resource Groups, you can assign the Owner role to users within Azure at the Resource Group level.
Navigate to your newly created Resource Group and click Access control (IAM). Then, follow the instructions to Assign Azure roles using the Azure portal.
Make sure to assign the built-in, privileged Owner role scoped to the Resource Group.
Authenticating with Azure
Make sure that you are logged into the Azure portal using the same account you are using to perform the deployment.
Deployment
You can deploy UaaS on Azure either by using the Deployment Stack Template or by using the CLI.
Deploying with the Deployment Stack Template
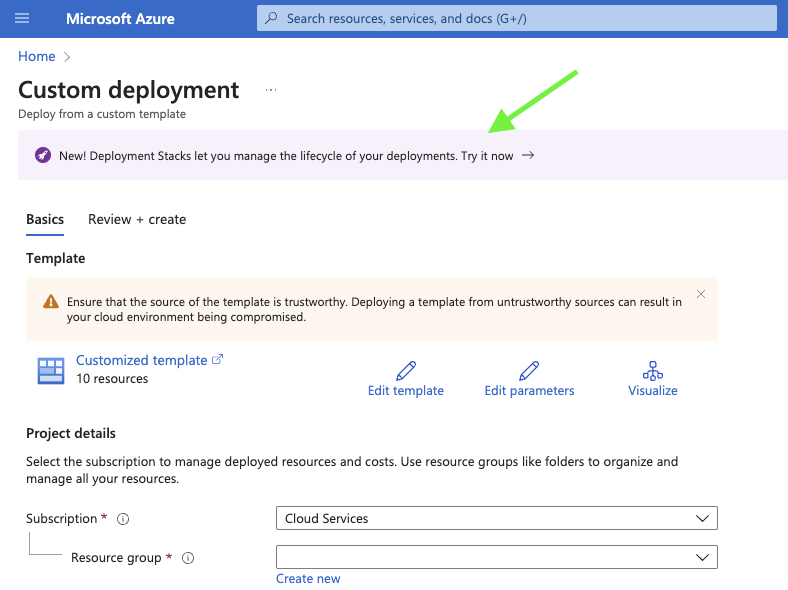
- To start, click Deploy to Azure on the main page.
- We are now using Deployment Stacks, which is a preview feature. Click the "Try it now" section on the template page:
- From here, you will need to configure the stack exactly like this image:
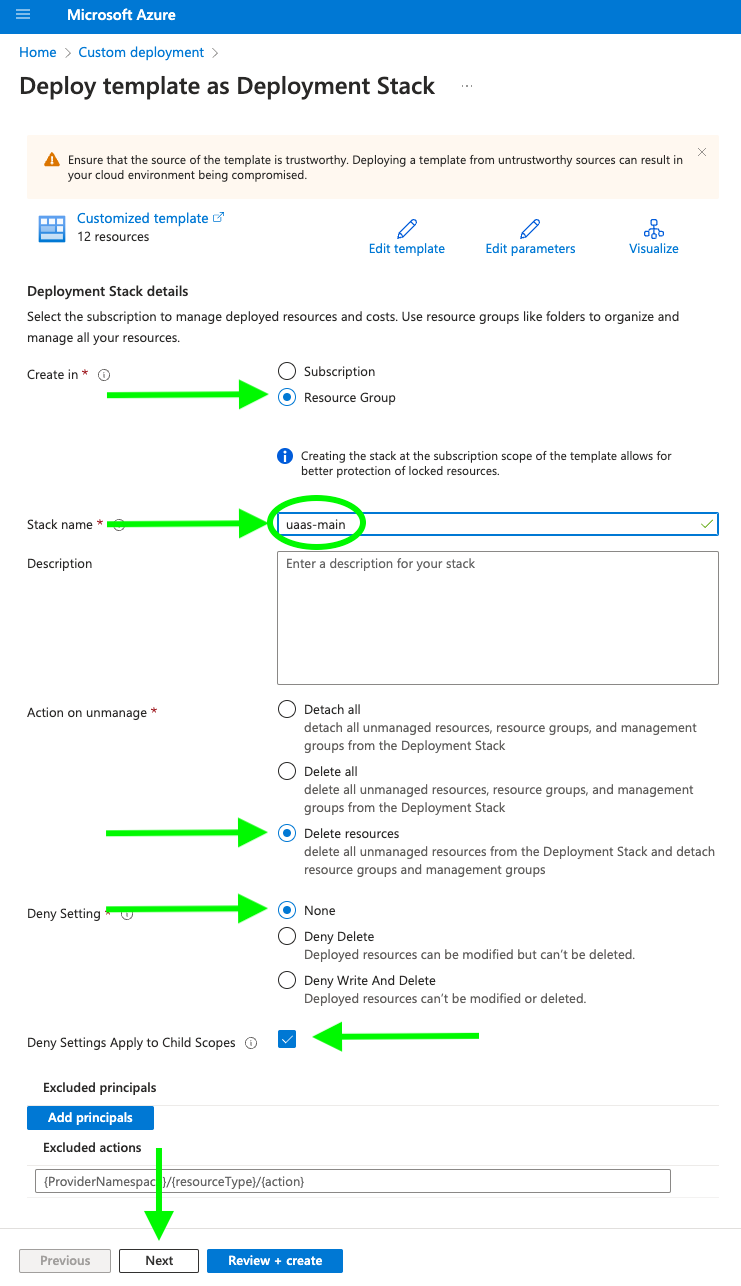
- After configuring the stack, click "Next" you will be able to configure the UaaS deployment.
- After configuring your deployment, click "Next" and then "Create" to deploy the stack.
The following options are available on the UaaS Deployment Stack Template:
- Subscription: Azure subscription name.
- Resource Group: Resource Group name created in the previous step.
- Region: Region where the subscription deployment information is stored.
- Idle Mode:
truewill deploy the stack in an idle state, with the most expensive resources spun down (to save on idle costs).falsewill deploy the stack with all resources spun up. - Docker Image Tag: Defaults to the latest released version.
- Default Location: This defaults to the Resource Group's location and should not be changed without consulting support.
- Log Level: Logger verbosity setting (defaults to
WARNING).
Note
These RUs are upper bounds. Users are charged 10 percent of the RUs at rest. So, for 100,000 RUs, users are charged for 10,000 RUs at rest. The minimum allowed value is 1000.
- Provisioned Inv RUs: Number of RUs (Request Units) to provision for the Inventory database.
- Provisioned Inv Meta RUs: Number of RUs (Request Units) to provision for the Inventory Metadata database.
- Provisioned Stats RUs: Number of RUs (Request Units) to provision for the Stats database.
- Serial Number: The serial number retrieved from your Nasuni Account.
- Auth Code: The auth code retrieved from your Nasuni Account.
- Resource Group Tags: This should be a json object in the form of
{"tagName": "tagValue"}. See Tag Resources for more information about Azure resource tagging.
If you have any questions about our recommended settings or cost evaluations, please reach out to your account representative.
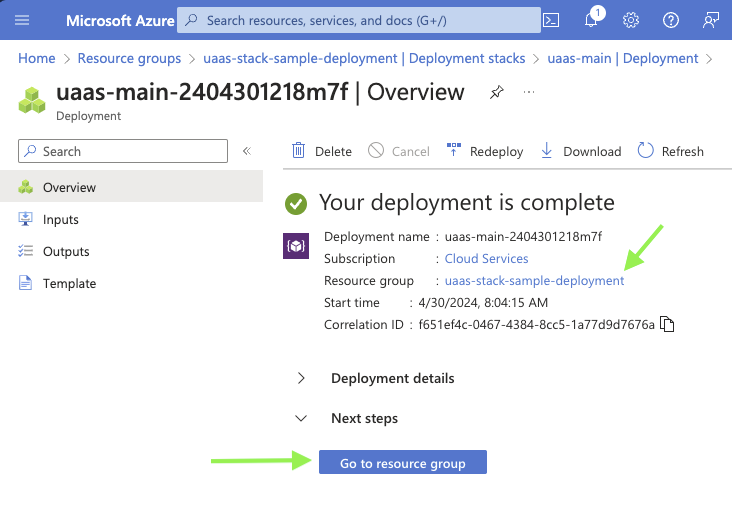
After reviewing and creating your deployment, you can access your newly created Resource Group directly from the deployment page:
Deploying with the CLI
Alternatively, deployment can be done via the AZ CLI.
Note
A resource group must exist for this command to work. Refer to Deployment Options for instructions on creating a resource group with the CLI.
az stack group create \
    --resource-group <resourceGroup> \
    --subscription <subscription> \
    --name <deploymentName> \
    --template-uri 'https://uaasartifactsprod.blob.core.windows.net/templates/1.3.2/uaas.json?se%3D2031-02-11%26sp%3Dr%26spr%3Dhttps%26sv%3D2026-02-06%26sr%3Dc%26sig%3D8tEoh9SIwLSr0vaXsfWcZvyojE5H4LxAJOvjng5gkMU%253D' \
    --deny-settings-mode none \
    --cs  # Applies deny settings to child resources \
    --action-on-unmanage deleteResources \
    --output table \
    --parameters \
        idleMode=true \
        dockerImageTag="1.3.2" \
        defaultLocation=eastus \
        logLevel=WARNING \
        provisionedInvRus=60000 \
        provisionedInvMetaRus=20000 \
        provisionedStatsRus=60000 \
        serialNumber=<mySerialNumber> \
        authCode=<myAuthCode> \
        resourceGroupTags="{\"tagName\": \"tagValue\"}"
Refer to the main Deployment section above for the meaning of the various parameters.
Any of the parameters that appear in the --parameters section above can be omitted (with the exception of serial number and auth code), and the default is automatically used instead. The parameters are listed explicitly solely to clarify the syntax.
<deploymentName> is equivalent to stack name in the template based deployment, it is a user-chosen name for the deployment stack that is created within the resource group.
A simple installation with all of the defaults can be performed using a command like:
az stack group create \
    --resource-group <resourceGroup> \
    --subscription <subscription> \
    --name <deploymentName> \
    --template-uri 'https://uaasartifactsprod.blob.core.windows.net/templates/1.3.2/uaas.json?se%3D2031-02-11%26sp%3Dr%26spr%3Dhttps%26sv%3D2026-02-06%26sr%3Dc%26sig%3D8tEoh9SIwLSr0vaXsfWcZvyojE5H4LxAJOvjng5gkMU%253D' \
    --deny-settings-mode none \
    --cs  # Applies deny settings to child resources \
    --action-on-unmanage deleteResources \
    --parameters serialNumber=<mySerialNumber> \
        authCode=<myAuthCode>
Getting the API URL
From the Azure Console
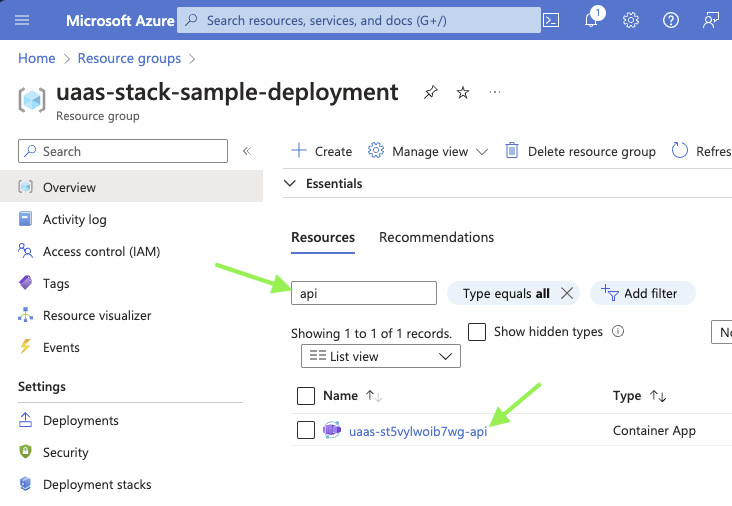
On your Resource Group page, search for api under Resources and click on the result.
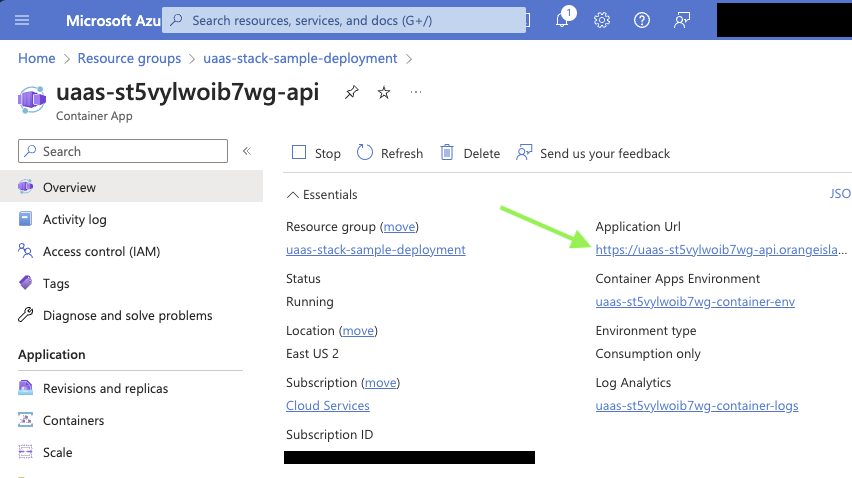
On the API Container App page, the Application URL is listed on the top right.
From the CLI
Run the following command to output the API URL:
 az stack group list --resource-group <resourceGroupName> \
   | jq -r '.[0].outputs | with_entries( select(.key | contains("Url"))) | .[].value'
Updates
Steps before updating
On Azure, the procedure for updates is almost the same as that for the initial installation, with the exception of deploying the Resource Group.
Updating using the Deployment Console
You can use the link on the main page
under the Update Azure section. Just use your existing stack name and location.
Updating using the Azure CLI
Follow the same deployment procedure as the installation. For the --template-uri parameter, you should use https://uaasartifactsprod.blob.core.windows.net/templates/latest/uaas.json?se%3D2031-02-11%26sp%3Dr%26spr%3Dhttps%26sv%3D2026-02-06%26sr%3Dc%26sig%3D8tEoh9SIwLSr0vaXsfWcZvyojE5H4LxAJOvjng5gkMU%253D
After updating your stack, make sure to follow any post-deployment procedures.
Automatic Scaling At Rest
When a UaaS Azure Stack is deployed, the default mode is in an idle state. When a job is requested, the stack will perform an automatic scale-up of required resources to run a job.
UaaS Azure Stacks will automatically scale down after 2 hours of inactivity. We define "inactivity" as:
- No jobs in progress or failed state
When a stack is scaled down, the following resources will be deleted/stopped in order to save on idle costs:
- Provisioned Cosmos Database Containers (inventory is backed up via Archive mechanism)
- Event Hubs
- Stream Analytics
- Scaling Rules on Container Apps workers
- Cron schedule for
scale-downContainer App Job
The following resource will remain active as they produce no (or negligible) idle costs:
- Container Apps/Jobs (scaled to 0 at rest)
- Container App Environment
- Container Log Analytics
- Provisioned Cosmos Database (we retain the database because deleting and recreating the containers is faster that deleting the entire database definition)
- Serverless Cosmos Database
- Archive Storage Account
- ServiceBus Queues
- Dashboard
Tearing down a stack
Sometimes, you may need to tear down a stack and start over. These instructions help you do that.
Note
Tearing down resources with the command line requires the Azure CLI to be installed.
Note
The command line returns immediately, but it does take up to an hour for all resources to be removed from your subscription. You must wait for ALL resources to be destroyed before redeploying in the same Resource Group.
Navigating to Azure Portal Resource Group
-
From your Portal homepage, click
Resource Groups.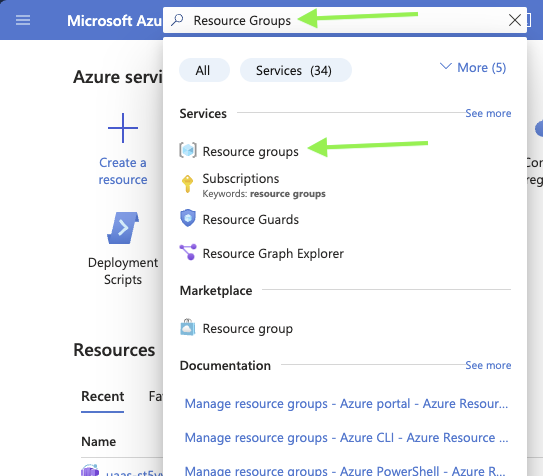
-
From the Resource Groups landing page, search for your Resource Group. Press
Enterto load your search and click on the Resource Group you want to modify.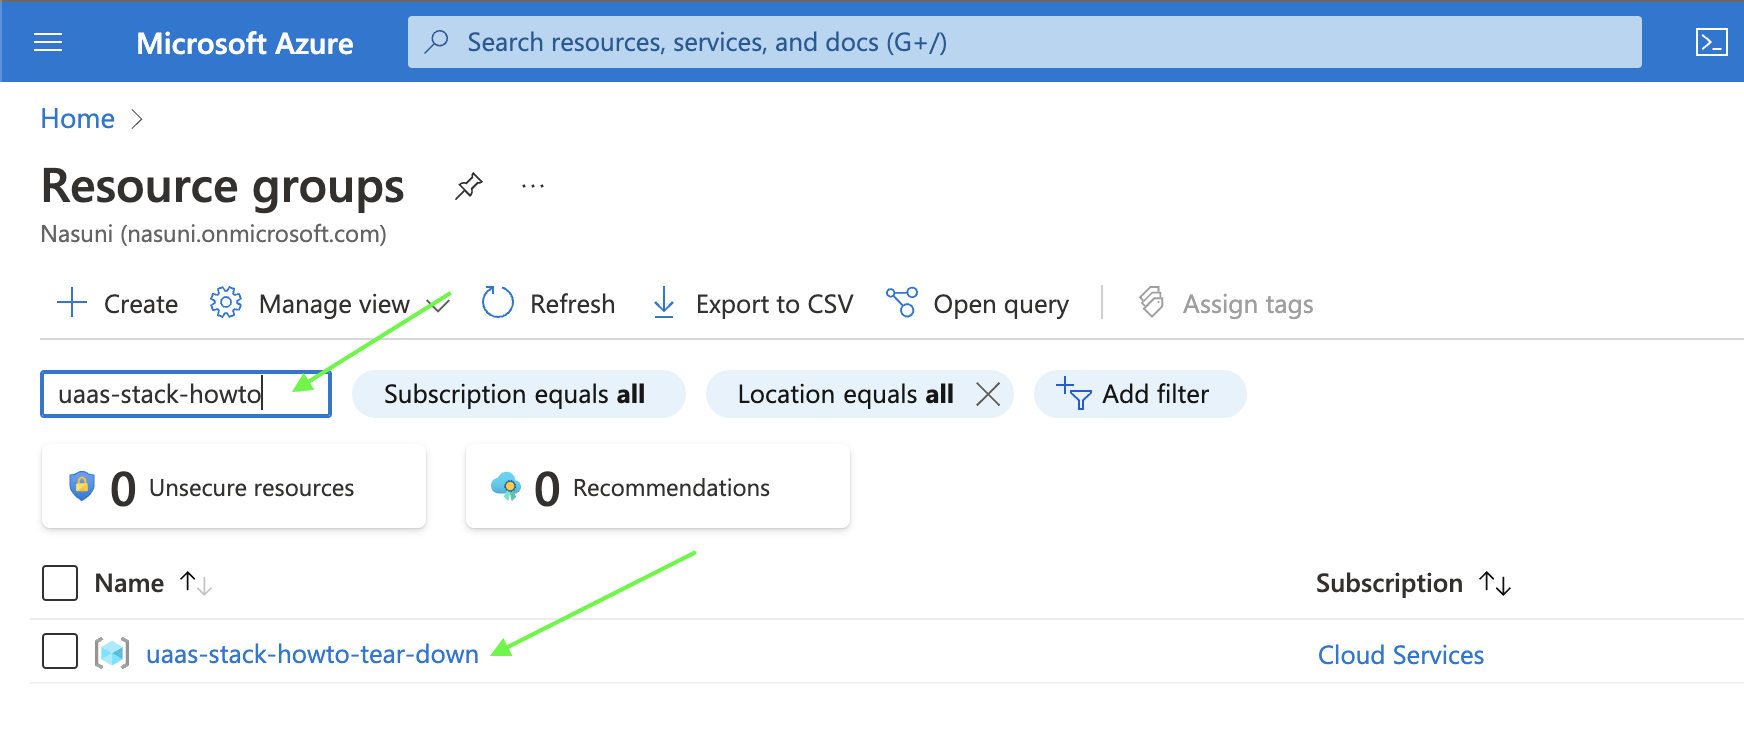
Subscription Owner Tear Down
With full owner privileges on your subscription, you can directly remove the Resource Group without first removing the associated resources.
Tearing down From the Portal
- From your Resource Group page, click
Delete resource group. - Enter your Resource Group name to confirm and click
Deleteat the bottom. This process can take anywhere from a few minutes to an hour.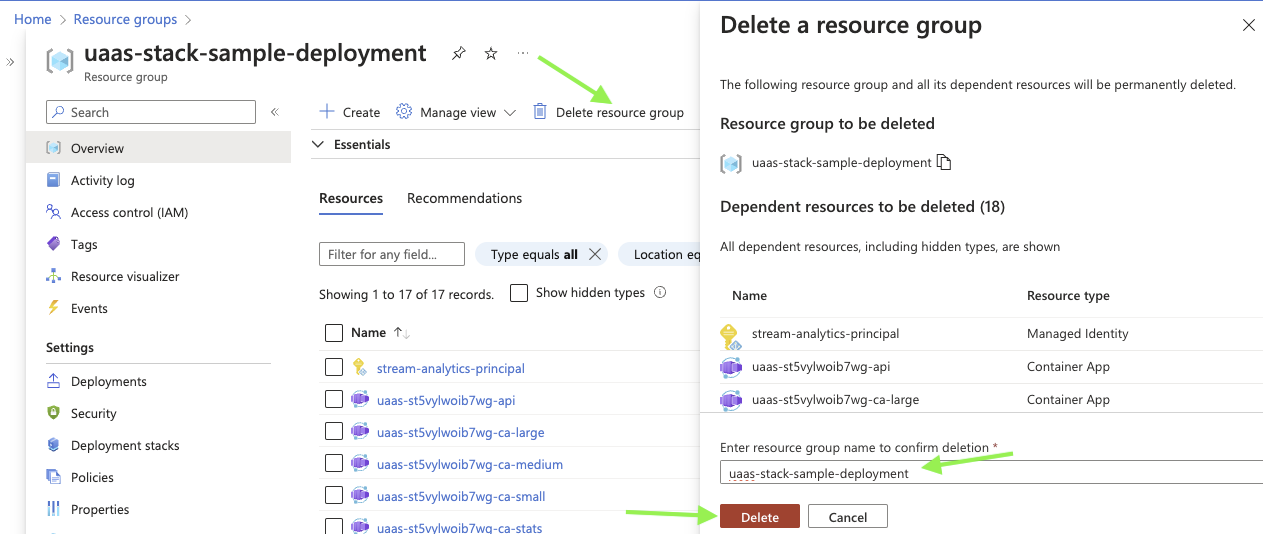
Tearing down From the Command Line
Deleting the Resource Group from the command line is a simple one-line command:
az group delete --subscription <mySubscription> --name <myResourceGroup> --yes --no-wait
where <mySubscription> is your Azure subscription ID;
<myResourceGroup> is the name of the resource group you are trying to delete.
Resource Group Owner Tear Down
As a Resource Group Owner, you have access to delete the deployment stack, which will remove all associated UaaS resources within the Resource group.
Tearing down from the Portal
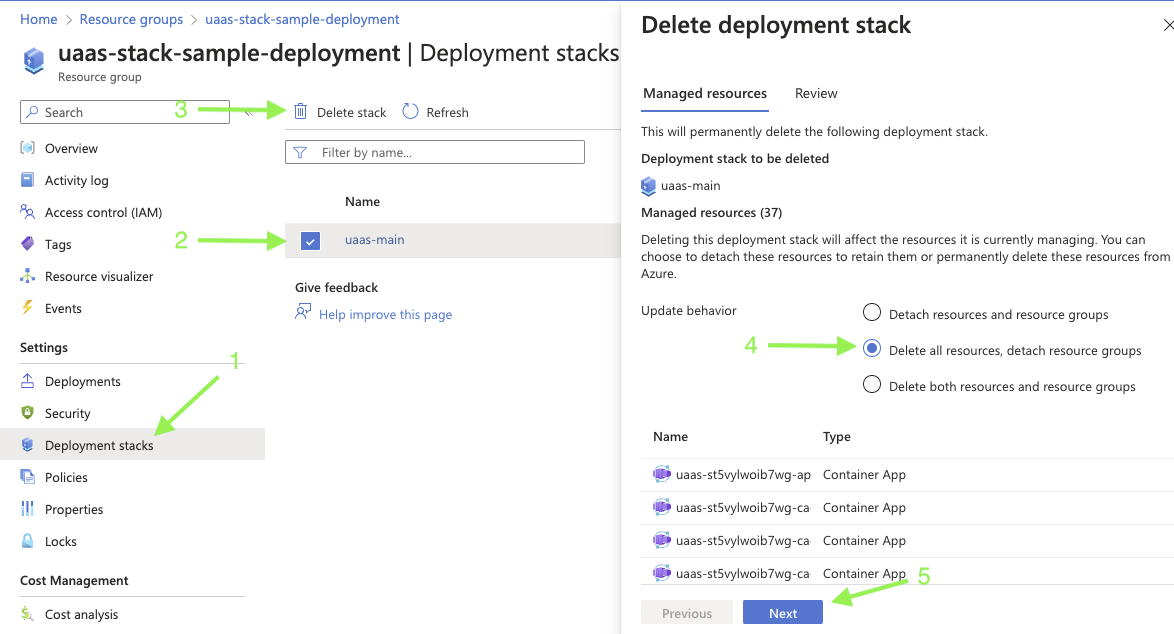
- Click on "Deployment stacks" on the Resource Group left nave.
- Tick the checkbox by "uaas-main" deployment stack
- Click "Delete stack"
- Select the bubble "Delete all resources, detach resource groups" on the popup
- Click "Next"
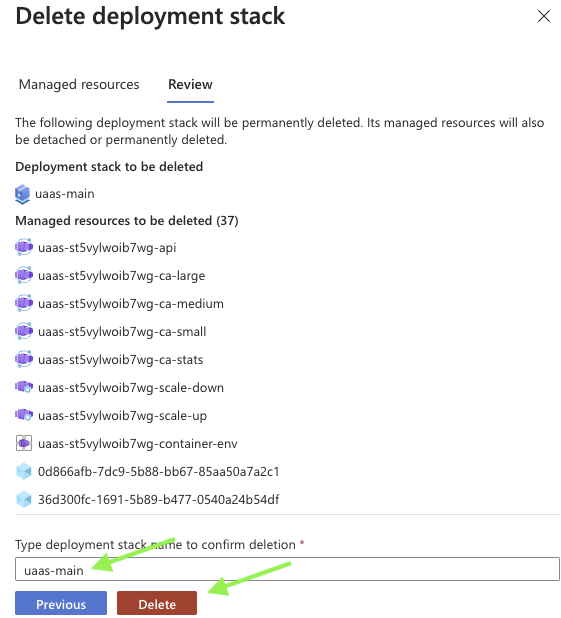
- Enter the deployment stack name (
uaas-main) - Click "Delete"
Tearing down from the Command Line
Tearing down from the command line is as easy as deleting the stack:
az stack group delete \
    --action-on-unmanage deleteResources \
    --name <deploymentName> \
    --resource-group <myResourceGroup>
    --subscription <mySubscriptionId>
    --yes
where <mySubscriptionId> is your Azure subscription guid;
<myResourceGroup> is the name of the Resource Group for your deployment.
Note
If you get an error about --action-on-unmanage, please update your Azure CLI and Azure bicep (az bicep upgrade)
Removing the stack from your Nasuni account
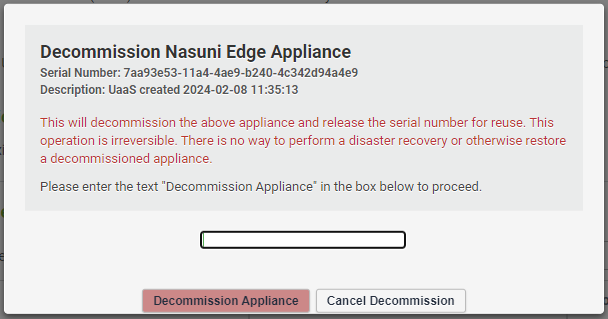
After tearing down the stack, you can decommission the stack and reclaim its associated serial number.
-
Log into account.nasuni.com
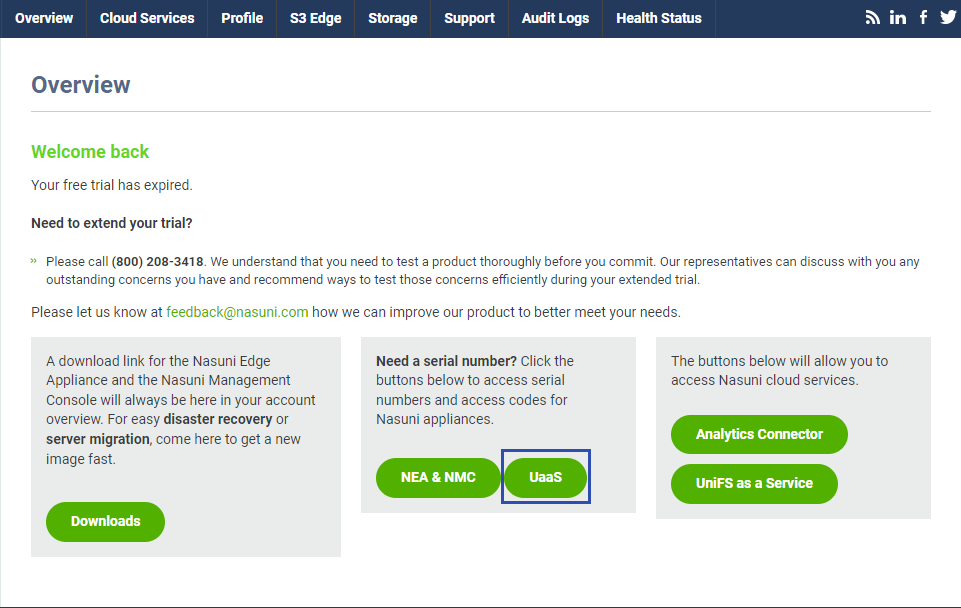
-
Click on the UaaS button in the "UaaS" button in the serial number box.
-
On the serial numbers page, find the row with a "Description" that matches the name of the stack that you have removed and click the "Decommission..." link.
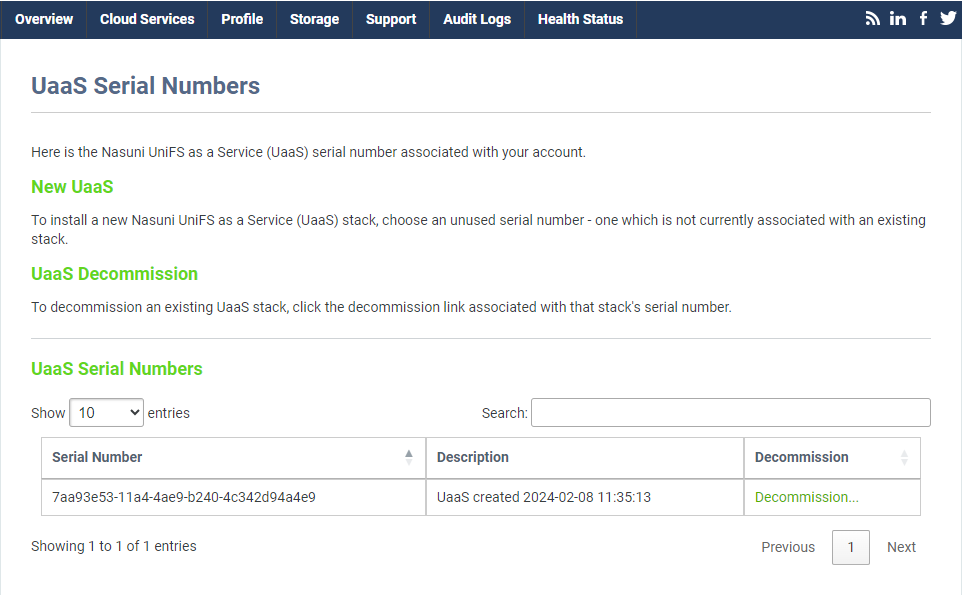
-
Confirm that you want to decommission the stack by entering the required text and click the decommission button.